

-
 Autor: Simmy Mishra
How To Connect Canon Printer to Computer
You can connect your Canon printer to a computer through Wi-Fi, USB, or a wired network connection. Then you'll need to install the driver for the printer, and you'll be all set up!
Here’s a step-by-step guide on how to connect your Canon printer to a computer. Let’s dive right in!
Connecting a Canon Printer to a Computer
There are two easy steps How to connect Canon printer to a computer. Note that some settings might vary depending on the printer model you have. Here we go!
Step #1: Connect the Two Devices
You can connect your printer to your computer in three ways.Let’s check them in detail.
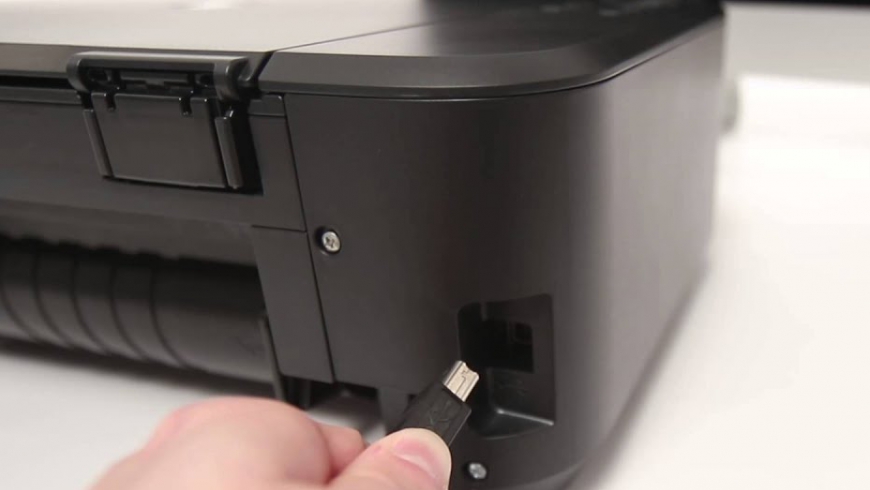
Using a USB Cable
A USB connection is an ideal option if you plan on printing using only your computer. This method directly connects your computer and is completely hassle-free. Just take a USB cable and plug one end into your computer’s USB port and the other into the printer’s USB port.
Next, plug in the printer and switch it on. After that, you need to install the driver to be able to use it, which we’ll get to in just a bit.
Using Wi-Fi
If you have a wireless printer, you can connect it to your computer using Wi-Fi. We like this method the most because you can use your Canon printer to print incoming documents or pictures from any device that’s on the same Wi-Fi, including cellphones!
Here’s what you need to do for this method:
- Switch on the printer.
- On the control panel of your printer, go to “Menu” > “Network Settings” and then “Wireless LAN.“
- Press “OK.” Choose your Wi-Fi and put in the password. Make sure both your computer and printer are on the same network.
- That’s it! You’ll need to install the driver now.
The steps to connect to Wi-Fi can differ from model to model. Make sure you go through your printer’s manual to know how to connect it to the internet wirelessly.
Using a wired network
The upside of using a wired connection is that multiple devices on the same wired network can use the printer, but you’ll have to use an Ethernet cable for it.
To connect your printer via a wired network (through your router), here’s what you need to do:
- Take an Ethernet cable and connect one end to your router and the other one to your printer.
- Switch on the printer.
- On the control panel, go to “Menu” > “Network Settings,” and then “Wired LAN.” Again, remember that this can differ from model to model, so refer to the user manual first.
- Now you’ll only need to install the driver on your computer.
Step #2: Install the Printer Driver
To make sure the two devices can communicate, you need to install (and update) a driver for the printer.
If your computer can detect the printer, you’ll be able to see some on-screen instructions for installing the driver.
If you don’t, you’ll have to install it manually. For this, there are two ways – you can use the installation disk that comes with the printer, or you can find the driver on Canon’s official support site.
For the latter, here’s a quick rundown of what you need to do:
- Go to https://www.usa.canon.com/internet/portal/us/home/support.
- Search for your model.
- Navigate to the “Drivers & Downloads” section. Select your OS, and click “Next“ on the driver you want to install.
- Click on “Download.”
- Once it’s done, open the file and follow the setup wizard. Choose the suitable method you used to connect your printer and click on “Next.”
- Once you make your way through all the steps, you’ll be able to use your printer.
How to Connect Canon Printer on Mac
Do you have a Canon printer or have you bought one off late? No matter whichever between the two holds true in your case, the fact remains that you need to know how to connect Canon printer to mac to use it properly.
Merely knowing how to add Canon printer to Mac may not be helpful to you. Additionally, you also need to know how to download and install the drivers to finish the process of connecting both the devices with one another. Read on to know the whole process in detail.
How to Connect Canon Printer on Mac without CD
If you do not have access to the CD which comes across with a Canon printer, there are other ways to install it other than by using its compact disk on your Mac.
Sometimes this situation may also arise if your Mac does not have an inbuilt CD-ROM drive or a DVD-ROM drive.
To be on the safe side, avoid doing so from any third-party website as it may bring in some potentially unwanted software along with the software which you are looking for. This can slow down the performance of your Mac at the subsequent stages.
So, the first thing you should do is think about downloading and installing drivers and software from the official website of Canon. This will help you set up your Mac wirelessly. Thereafter, you can think about downloading the requisite drivers later.
Steps to Connect Canon Printer on Mac
- Locate the button which corresponds to the menu on your printer.
- Highlight WLAN setup using the navigation (arrow) keys. Once this is done, press OK.
- The printer will run a search to look for networks that are nearby its position.
- Next, you will see three options on the screen: Standard setup, WPS and Other setup. The first one is automatically highlighted so press OK. Your printer may also prompt for connection to a WPS router if there is one located to its range. You can select “OK’ if you wish to permit the use of the option. Otherwise, you can also press OK to bypass it.
- The printer will hunt for the networks that are functional within its range. You will see the names of the available networks in the form of a list. Choose your preferred network out of the options shown on the list. If you wish to scroll through the options, you can make use of the arrow keys for the purpose. After successfully highlighting your preferred network, push the option ”OK”.
- The “Enter passphrase” screen will appear immediately if you have set your router on a password. In case you have one, enter the password and then press “OK” to enter the character entry screen. In case you have not set up a password, the wireless network would connect immediately on its own.
- When you are on the character entry screen, you will need to navigate among the characters using the arrow keys to set up a password for your wireless network.
- After you are done with the entry of your password, the next thing you need to do is to push the button which appears at the bottom left-hand corner of the screen just below “Done”.
- In the next step, the printer will proceed to connect to the network. Once this process is complete, press OK.
This concludes the steps on how to connect canon printer to Mac . There is one more thing you need to do: download and install the software to control your printer from your Mac device.
Now that you have learned how to install Canon printer on Mac, follow these simple steps for the installation of required software and drivers.
- First, go to the official website of Canon printer support page. Normally, it will automatically detect the version of the operating system installed on your Mac computer. If it fails to do so, you can choose it manually from the list of the operating system on the drop-down menu.
- Next, navigate to the option “Drivers & Downloads” in the 'Drivers' section first download and then install the requisite drivers: the ICA driver, the MX920 series scanner and the CUPS printer driver.
- When the process of the installation of drivers is complete, click on the button to the right of the drivers and click download.
- Once downloaded, open all the drivers one by one. You will see a new window involving a package file on the screen. Open the file by clicking on it two times.
- After opening the file, follow the instructions that you see on the screen. Execute this process for all the downloaded files.
- Now open the Apple menu and choose the option “System Preferences”. Next, choose the option which corresponds to print, fax, scan, printers and scanners (the option on the screen may vary depending on the version of Mac OS on your Mac computer).
- On the bottom left part of the screen, you will see a “+” button. Click on it. Then you will see an option “Add printer or scanner”. You need to click on this option as well.
- Wait for a few seconds until the name of your Canon printer appears on the screen. When its name appears on the screen, choose the “Add” option.
That's it! Your Canon printer is now setup wirelessly and is ready for use.
Komentarze